
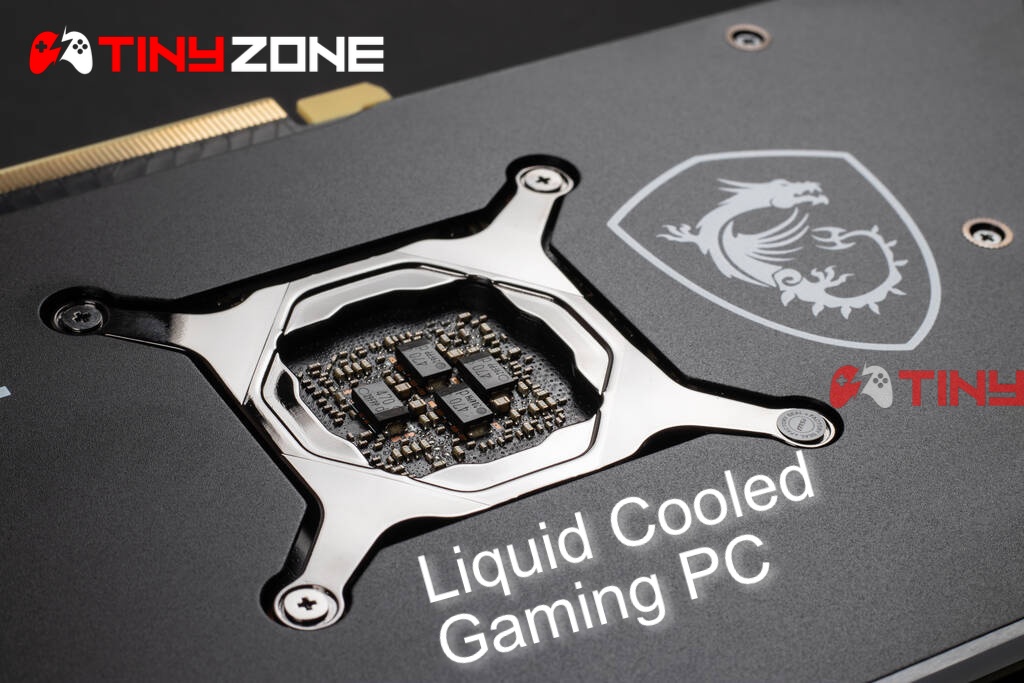
Liquid Cooled Gaming PC – More Exploration In Details
In the ever-evolving industry of gaming technology, performance, and aesthetics play pivotal roles in shaping the gaming experience. One of the standout advancements in this realm is the adoption of liquid cooling systems in gaming PCs. This comprehensive guide delves deep into the intricacies of liquid-cooled gaming PCs, exploring their benefits, components, setup processes, maintenance requirements, and much more. Whether you’re a seasoned gamer looking to upgrade your rig or a newcomer eager to understand the advantages of liquid cooling, this article provides valuable insights to help you make informed decisions.
Introduction to Liquid Cooling
Liquid cooling, also known as water cooling, is a method of cooling computer components using liquid as the heat transfer medium. Unlike traditional air cooling, which relies on fans and heatsinks, liquid cooling offers more efficient heat dissipation, leading to better performance and quieter operation.
Why Choose Liquid Cooling?
- Enhanced Cooling Efficiency: Liquid cooling systems can dissipate heat more effectively than air coolers, allowing components to run at lower temperatures.
- Reduced Noise Levels: Liquid cooling often results in quieter operation since it relies less on high-speed fans.
- Aesthetic Appeal: Many liquid cooling systems feature sleek designs with customizable RGB lighting, adding a visual flair to your gaming setup.
- Overclocking Potential: Lower temperatures provide greater headroom for overclocking, enabling higher performance levels.
Common Liquid Cooling Types
| Type | Description |
|---|---|
| Closed-Loop (All-in-One) | Pre-assembled and sealed units requiring minimal maintenance. |
| Custom Loop | Tailored setups allowing customization of components and tubing. |
| Open-Loop | Systems with exposed components, typically used for display purposes. |
Understanding the different types of liquid cooling systems helps in selecting the one that best fits your needs and expertise level.
Components of a Liquid Cooling System
A liquid cooling system comprises several key components, each playing a vital role in the cooling process.
Essential Components
| Component | Description |
|---|---|
| Pump | Circulates the coolant throughout the loop. |
| Radiator | Dissipates heat from the coolant, usually with fans attached. |
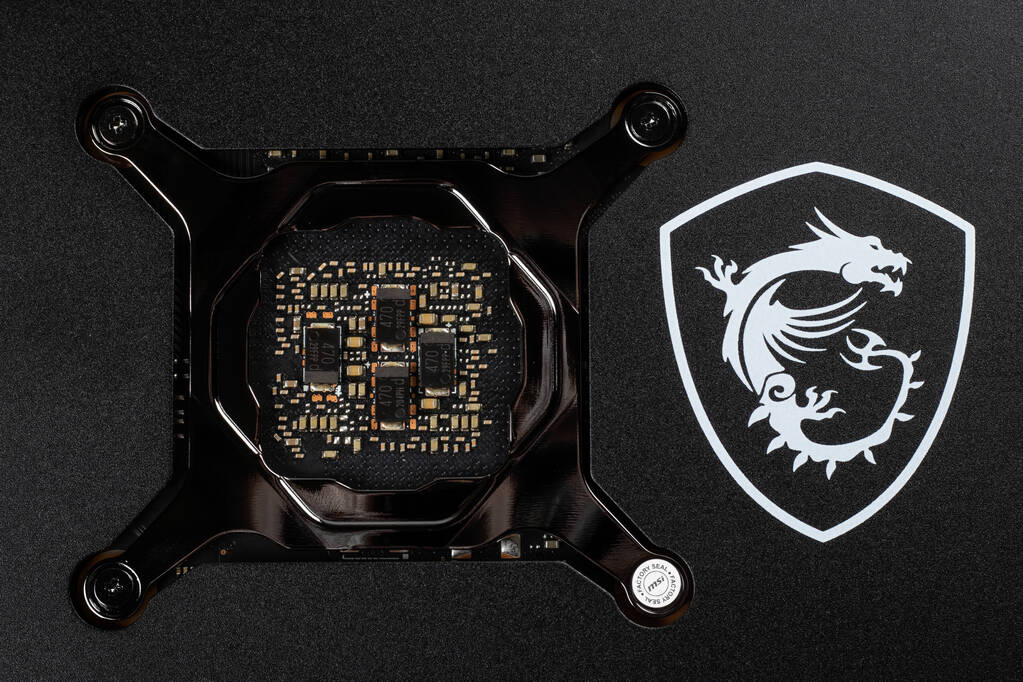
| Water Block | Transfers heat from the CPU/GPU to the coolant. |
| Reservoir | Stores excess coolant and helps in filling the system. |
| Tubing | Connects all the components, allowing coolant flow. |
| Coolant | The liquid used to transfer heat, often colored for aesthetics. |
| Fittings | Connectors that secure tubing to components. |
| Fans | Attached to radiators to aid in heat dissipation. |
Optional Components
| Component | Description |
|---|---|
| Temperature Sensors | Monitor coolant and component temperatures. |
| Flow Meters | Measure the flow rate of the coolant. |
| RGB Lighting | Adds visual effects to the cooling system. |
Selecting high-quality components ensures the reliability and efficiency of your liquid cooling system.
Benefits of Liquid Cooling in Gaming PCs

Liquid cooling offers numerous advantages over traditional air cooling, making it a preferred choice for many gamers and PC enthusiasts.
Superior Cooling Performance
- Efficient Heat Dissipation: Liquid can carry heat away from components more effectively than air, maintaining optimal operating temperatures.
- Consistent Temperatures: Liquid cooling provides more stable cooling, reducing temperature fluctuations during intense gaming sessions.
Quieter Operation
- Reduced Fan Noise: Liquid cooling systems often use larger, slower-spinning fans that generate less noise compared to multiple high-speed case fans.
- Pump Noise Management: With proper setup, pump noise can be minimized, ensuring a quieter gaming environment.
Enhanced Overclocking Capabilities
- Increased Stability: Lower temperatures allow for higher and more stable overclocking of CPUs and GPUs, boosting performance.
- Longevity of Components: Efficient cooling reduces thermal stress, potentially extending the lifespan of critical components.
Aesthetic Appeal
- Customizable RGB Lighting: Many liquid cooling systems feature RGB lighting, allowing for personalized and visually striking PC builds.
- Clean and Organized Build: Tubing and components can be arranged neatly, enhancing the overall look of the gaming rig.
Space Efficiency
- Flexible Design: Liquid cooling systems can be tailored to fit various case sizes and configurations, offering more flexibility in component placement.
- Reduced Clutter: Fewer fans and heatsinks can lead to a more streamlined and organized interior.
Comparing Liquid Cooling to Air Cooling
Understanding the differences between liquid and air cooling is essential in making an informed decision for your gaming PC.
Performance
- Liquid Cooling: Generally offers better cooling performance, especially under high loads and overclocking conditions.
- Air Cooling: Adequate for standard gaming setups but may struggle with high-performance components and extreme overclocking.
Noise Levels
- Liquid Cooling: Typically quieter, with fewer and slower-moving fans.
- Air Cooling: Can be noisier due to the reliance on multiple high-speed fans.
Installation and Maintenance
- Liquid Cooling: More complex to install and may require regular maintenance, especially custom loops.
- Air Cooling: Easier to install and maintain, making it suitable for beginners.
Cost
- Liquid Cooling: Generally more expensive, with closed-loop systems being pricier than high-end air coolers.
- Air Cooling: More budget-friendly, offering a wide range of options to fit various price points.
Aesthetics
- Liquid Cooling: Offers superior aesthetic customization with tubing, coolant colors, and RGB lighting.
- Air Cooling: Limited aesthetic options, primarily focusing on the design of heatsinks and fans.
Reliability
- Liquid Cooling: Potential for leaks and requires careful installation to ensure reliability.
- Air Cooling: More reliable with fewer points of failure, as there are no liquids involved.
Choosing the Right Liquid Cooling System
Selecting the appropriate liquid cooling system depends on various factors, including your PC build, performance needs, budget, and aesthetic preferences.
Closed-Loop (All-in-One) Systems
- Pros:
- Easy to install with minimal setup.
- Pre-sealed and maintenance-free.
- Ideal for users seeking a plug-and-play solution.
- Cons:
- Limited customization options.
- Generally less efficient than custom loops.
- Best For: Gamers looking for efficient cooling without the complexity of custom setups.
Custom Loop Systems
- Pros:
- Highly customizable in terms of components and aesthetics.
- Superior cooling performance, especially for high-end builds.
- Ability to cool multiple components (CPU, GPU, etc.) simultaneously.
- Cons:
- More complex installation process.
- Requires regular maintenance to prevent issues like algae growth or coolant degradation.
- Higher initial cost due to individual component purchases.
- Best For: Enthusiasts and professionals seeking optimal performance and personalized aesthetics.
Open-Loop Systems
- Pros:
- Highly customizable and visually impressive.
- Easy access to components for display purposes.
- Cons:
- Less practical for daily use due to exposed components.
- Higher risk of spills and leaks.
- Best For: Showcasing builds in displays or events rather than for regular gaming use.
Factors to Consider When Choosing a System
- Budget: Determine how much you’re willing to spend on your cooling system.
- Performance Needs: Assess whether you require high-end cooling for overclocking or standard cooling for regular gaming.
- Aesthetic Preferences: Decide if you prioritize visual customization and RGB lighting.
- Ease of Installation: Consider your comfort level with installing and maintaining the system.
- Future Upgrades: Plan for potential future upgrades and how the cooling system will accommodate them.
Components of a Custom Liquid Cooling Loop
A custom liquid cooling loop offers unparalleled customization and performance. Understanding each component is crucial for building a reliable and efficient system.
Pump
- Function: Circulates the coolant through the loop.
- Types: Integrated pumps (often part of the reservoir) or separate pumps for enhanced performance.
- Considerations: Flow rate, noise levels, and compatibility with other components.
Radiator
- Function: Dissipates heat from the coolant.
- Sizes: Common sizes include 120mm, 240mm, 360mm, and 480mm, corresponding to the number of fans they can accommodate.
- Considerations: Airflow, fan configuration, and space within the PC case.
Water Block
- Function: Transfers heat from the CPU, GPU, or other components to the coolant.
- Types: CPU water blocks, GPU water blocks, and multi-blocks for cooling multiple components.
- Considerations: Compatibility with your specific CPU/GPU socket and the thermal performance of the block.
Reservoir
- Function: Holds excess coolant, making it easier to fill and maintain the loop.
- Types: Integrated reservoirs (often part of pump combos) or separate units.
- Considerations: Size, ease of access, and aesthetic features like fill lines or lighting.
Tubing
- Function: Connects all components, allowing the coolant to flow.
- Types: Rigid tubing (acrylic or PETG), soft tubing (PVC or rubber), and flexible tubing options.
- Considerations: Diameter, length, and aesthetic choices (clear, colored, or braided).
Coolant
- Function: Transfers heat away from components.
- Types: Pre-mixed coolants (non-conductive) or distilled water with additives.
- Considerations: Color, viscosity, and compatibility with system materials to prevent corrosion or algae growth.
Fittings
- Function: Connect tubing to components securely.
- Types: Compression fittings, barb fittings, and quick-disconnect fittings.
- Considerations: Material (plastic vs. metal), size compatibility, and ease of installation.
Fans
- Function: Aid in dissipating heat from radiators.
- Types: PWM fans, static pressure fans, and RGB fans.
- Considerations: Airflow (CFM), noise levels (dBA), and lighting options.
Additional Components
- Flow Meters: Monitor the flow rate of the coolant.
- Temperature Sensors: Keep track of coolant and component temperatures.
- Lighting Strips: Enhance the visual appeal of the cooling loop.
Step-by-Step Guide to Installing a Liquid Cooling System
Installing a liquid cooling system requires careful planning and attention to detail. Below is a step-by-step guide to help you through the process.
Step 1: Planning Your Build
- Assess Your Components: Ensure compatibility between the cooling system and your CPU/GPU.
- Choose Your Cooling Type: Decide between closed-loop and custom loop based on your needs and expertise.
- Select Components: Gather all necessary components, including pump, radiator, water blocks, tubing, coolant, fittings, and fans.
- Measure Space: Verify that your PC case can accommodate the chosen radiator sizes and component placements.
Step 2: Preparing the Components
- Assemble the Pump and Reservoir: If using separate units, mount the pump securely and connect it to the reservoir.
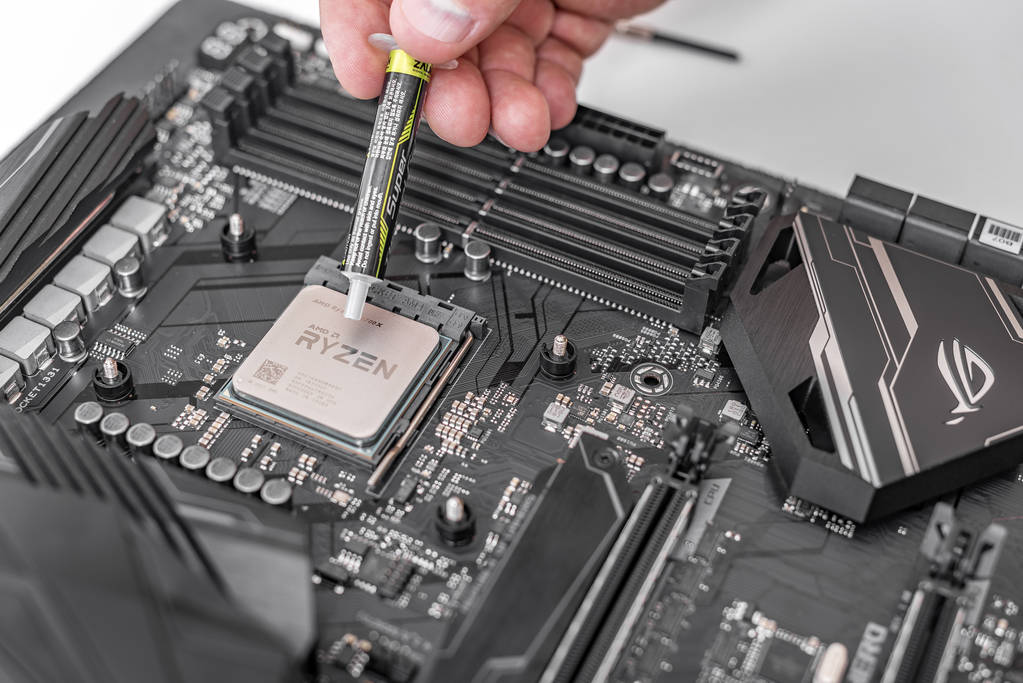
- Install Water Blocks: Carefully attach the water blocks to the CPU and GPU, ensuring proper contact and thermal paste application.
- Mount Radiators and Fans: Install radiators in the designated areas of the case and attach fans securely.
Step 3: Routing the Tubing
- Plan the Loop Path: Determine the most efficient route for tubing to minimize bends and maximize airflow.
- Cut Tubing to Length: Measure and cut tubing to the required lengths, ensuring a neat and organized layout.
- Attach Fittings: Secure fittings to components, ensuring a tight and leak-free connection.
Step 4: Filling the System
- Add Coolant: Pour the coolant into the reservoir, filling it to the recommended level.
- Prime the Pump: Power the pump without turning on the PC to circulate the coolant and remove air bubbles.
- Check for Leaks: Inspect all connections and components for any signs of leakage during the priming process.
Step 5: Finalizing the Installation
- Secure All Components: Ensure that all parts are firmly mounted and that tubing is neatly arranged.
- Cable Management: Tidy up cables to prevent obstruction of airflow and maintain a clean build.
- Power On and Test: Start the PC and monitor temperatures and pump operation to ensure everything functions correctly.
Step 6: Maintenance and Monitoring
- Regular Inspections: Periodically check for leaks, coolant levels, and component integrity.
- Coolant Replacement: Replace coolant as recommended by the manufacturer to prevent buildup and maintain efficiency.
- System Cleaning: Clean radiators and fans to ensure optimal airflow and cooling performance.
Maintenance Tips for Liquid Cooling Systems
Proper maintenance is crucial to ensure the longevity and efficiency of your liquid cooling system. Neglecting maintenance can lead to reduced performance, leaks, or even damage to components.
Regular Inspection
- Check for Leaks: Regularly inspect all connections, fittings, and tubing for any signs of coolant leakage.
- Monitor Coolant Levels: Ensure that the reservoir is adequately filled to maintain consistent cooling performance.
- Inspect Tubing: Look for any wear, cracks, or bulges in the tubing that could compromise the system’s integrity.
Coolant Management
- Replace Coolant Periodically: Depending on the type of coolant used, replace it every 6-12 months to prevent degradation and maintain optimal performance.
- Use High-Quality Coolants: Invest in premium coolants that offer better thermal performance and longer lifespans.
- Avoid Mixing Coolants: Stick to one type of coolant to prevent chemical reactions that could damage the system.
Cleaning Components
- Radiator Cleaning: Dust and debris can accumulate on radiators, hindering airflow. Clean radiators regularly using compressed air or a soft brush.
- Fan Maintenance: Ensure that fans are free from dust and obstructions to maintain efficient airflow and cooling.
- Water Block Cleaning: Remove any buildup on water blocks to ensure optimal heat transfer from components.
System Monitoring
- Temperature Monitoring: Use software tools to keep track of CPU and GPU temperatures, ensuring they remain within safe limits.
- Flow Rate Monitoring: Check the pump’s flow rate to ensure that coolant is circulating efficiently throughout the loop.
- Pressure Testing: Periodically perform pressure tests to detect potential leaks or weaknesses in the system.
Handling Leaks and Issues
- Immediate Action: If a leak is detected, power off the PC immediately to prevent damage.
- Component Replacement: Replace any damaged or faulty components to restore the system’s integrity.
- Professional Assistance: Seek professional help if you’re unsure how to address specific issues, especially in complex custom loops.
Optimizing Performance with Liquid Cooling
Maximizing the benefits of liquid cooling involves more than just installation. Here are strategies to optimize your liquid-cooled gaming PC for peak performance.
Overclocking with Confidence
- Enhanced Overclocking Headroom: Utilize the lower temperatures provided by liquid cooling to push your CPU and GPU beyond standard clock speeds.
- Incremental Overclocking: Gradually increase clock speeds while monitoring temperatures and stability to avoid component stress.
- Use Overclocking Software: Leverage software tools to fine-tune overclocking settings and maintain optimal performance.
Efficient Airflow Management
- Positive Airflow Configuration: Ensure that more air is being pushed into the case than being exhausted to minimize dust accumulation.
- Strategic Fan Placement: Position intake fans to direct cool air over critical components and exhaust fans to remove hot air efficiently.
- Cable Management: Organize cables to prevent obstruction of airflow pathways, enhancing overall cooling efficiency.
Regular System Updates
- Firmware Updates: Keep your motherboard and cooling system firmware up to date to benefit from performance improvements and bug fixes.
- Driver Updates: Ensure that GPU and other component drivers are current to maintain compatibility and performance.
- Software Optimization: Optimize in-game settings and system software to reduce unnecessary thermal load on components.
Utilizing Monitoring Tools
- Temperature Monitoring: Use tools like HWMonitor, MSI Afterburner, or CAM to keep track of component temperatures in real-time.
- Performance Analysis: Analyze system performance metrics to identify bottlenecks and areas for improvement.
- Alert Systems: Set up alerts for when temperatures exceed safe thresholds, allowing for immediate action to prevent overheating.
Balancing Aesthetics and Functionality
- RGB Lighting Optimization: Configure RGB lighting to not interfere with airflow or cooling performance.
- Component Visibility: Arrange components and tubing to showcase aesthetics without compromising cooling efficiency.
- Custom Backplates: Use backplates that enhance both the look and structural integrity of your cooling system.
Common Challenges and Solutions in Liquid Cooling
While liquid cooling offers numerous benefits, it also comes with its set of challenges. Understanding these challenges and their solutions can help in maintaining an efficient and reliable system.
Leak Prevention
- Proper Installation: Ensure all fittings and connections are secure during installation to prevent leaks.
- Quality Components: Invest in high-quality pumps, fittings, and tubing to reduce the risk of leaks.
- Regular Inspections: Periodically check the system for signs of wear or potential leaks to address issues early.
Air Bubbles in the Loop
- Bleeding the System: Properly bleed air out of the loop during installation to ensure efficient coolant circulation.
- Using Quality Tubing: High-quality tubing reduces the likelihood of air pockets forming within the system.
- Pump Priming: Ensure the pump is primed correctly to maintain continuous coolant flow without air interruptions.
Maintenance Overhead
- Scheduled Maintenance: Establish a regular maintenance schedule to keep the system running smoothly.
- Simplify Maintenance: Use components that are easy to access and replace to reduce the complexity of upkeep.
- Educate Yourself: Stay informed about best practices in liquid cooling maintenance to prevent common issues.
Cost Considerations
- Budget Planning: Allocate a realistic budget that accounts for both initial setup and ongoing maintenance costs.
- Prioritize Components: Invest more in critical components like pumps and radiators, while opting for cost-effective options for less critical parts.
- DIY vs. Pre-Built: Consider the cost differences between building a custom loop and purchasing a closed-loop system based on your budget and expertise.
Compatibility Issues
- Component Compatibility: Ensure that all chosen components are compatible with each other and your PC build.
- Case Space: Verify that your PC case can accommodate the size and layout of your liquid cooling system.
- Manufacturer Guidelines: Follow manufacturer guidelines for installation to avoid compatibility problems and ensure optimal performance.
Future Trends in Liquid Cooling
The field of liquid cooling is continuously advancing, with new technologies and innovations enhancing performance, aesthetics, and user experience.
Advanced Coolants
- Biodegradable Coolants: Environmentally friendly options that reduce the ecological impact of liquid cooling systems.
- Enhanced Thermal Performance: Coolants with improved thermal conductivity for better heat dissipation.
- Colorless and Clear Coolants: Providing a cleaner look for custom loops without altering the aesthetics.
Smart Cooling Systems
- Integrated Monitoring: Systems with built-in sensors and software for real-time monitoring and adjustments.
- Automated Maintenance: Innovations aimed at reducing manual maintenance through automated processes.
- Adaptive Cooling: Systems that adjust cooling performance based on component temperatures and workload.
Modular Designs
- Easier Customization: Modular components that allow for quick and flexible customization of cooling loops.
- Scalability: Designs that accommodate future upgrades and expansions without significant overhauls.
- Interchangeable Parts: Components that can be easily swapped out for upgrades or replacements.
Aesthetic Enhancements
- Dynamic RGB Lighting: More sophisticated lighting options that react to in-game events or system performance.
- Transparent Components: Increased use of clear or transparent materials to showcase the cooling loop.
- Minimalist Designs: Sleek and simple designs that blend seamlessly with modern PC builds.
Integration with Other Technologies
- AI-Powered Cooling: Utilizing artificial intelligence to optimize cooling performance and predict maintenance needs.
- IoT Integration: Connecting liquid cooling systems to the Internet of Things for remote monitoring and control.
- Energy Efficiency: Developing systems that maximize cooling performance while minimizing energy consumption.
Building a Liquid Cooled Gaming PC: Case Study
To illustrate the practical application of liquid cooling in a gaming PC, let’s explore a case study that walks through the entire process from planning to execution.
Case Study Overview
- Objective: Build a high-performance liquid-cooled gaming PC capable of handling the latest AAA games at maximum settings.
- Budget: $2,500
- Components Chosen:
- CPU: Intel Core i9-13900K
- GPU: NVIDIA GeForce RTX 4090
- Motherboard: ASUS ROG Strix Z790-E
- RAM: 32GB DDR5
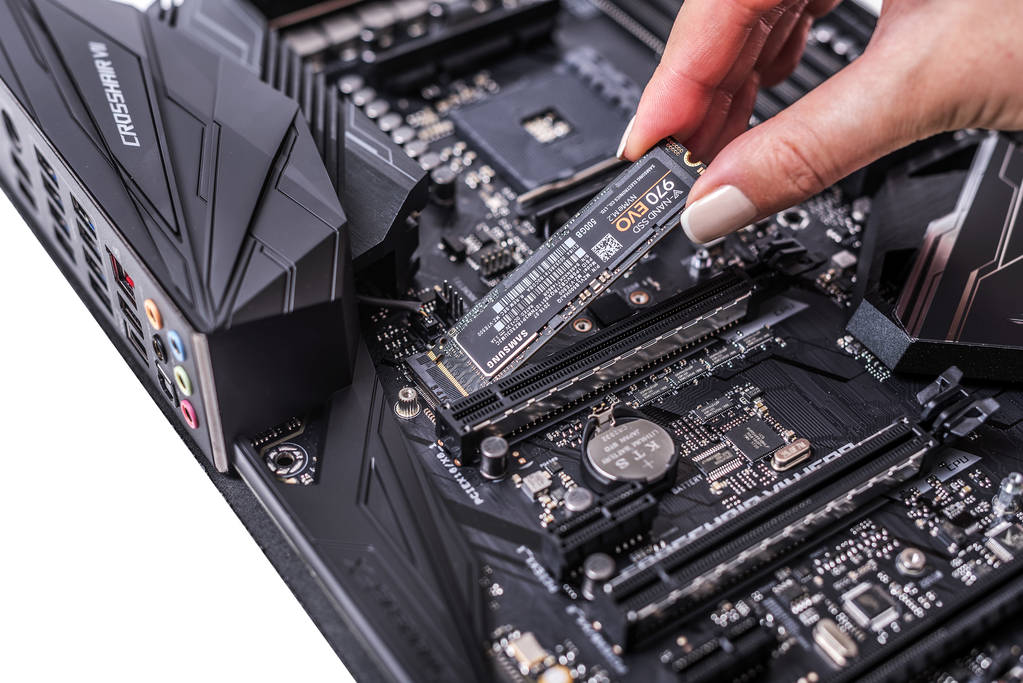
- Storage: 1TB NVMe SSD
- Case: Lian Li PC-O11 Dynamic
- Liquid Cooling System: Custom loop with separate pump and reservoir
Step 1: Planning and Component Selection
- Compatibility Check: Ensured that all components are compatible with the chosen liquid cooling system.
- Cooling Requirements: Determined that a 360mm radiator would suffice for cooling both the CPU and GPU.
- Aesthetic Goals: Selected RGB components to enhance the visual appeal of the build.
Step 2: Assembling the Liquid Cooling Loop
- Installing Water Blocks: Mounted the CPU and GPU water blocks, applying thermal paste for optimal heat transfer.
- Connecting Pump and Reservoir: Positioned the pump and reservoir at the bottom of the case for easy access and maintenance.
- Routing Tubing: Carefully routed tubing to connect the components, ensuring minimal bends and a clean layout.
- Mounting Radiator: Installed the 360mm radiator at the top of the case, attaching fans for efficient heat dissipation.
Step 3: Filling and Testing
- Adding Coolant: Filled the reservoir with a high-quality, non-conductive coolant.
- Priming the Pump: Powered the pump without the PC turned on to circulate the coolant and eliminate air bubbles.
- Leak Testing: Monitored the system for any leaks during the priming process, ensuring all connections were secure.
Step 4: Final Assembly and Testing
- Completing PC Build: Installed the remaining components, ensuring proper cable management and airflow.
- Performance Testing: Ran stress tests to monitor temperatures and verify the efficiency of the liquid cooling system.
- Overclocking: Increased CPU and GPU clock speeds, observing stable temperatures and enhanced performance.
Outcome
The liquid-cooled gaming PC successfully maintained low temperatures even under heavy loads, allowing for substantial overclocking without thermal throttling. The system operated quietly, and the aesthetic enhancements provided a visually stunning build that stood out in any gaming setup.
Troubleshooting Common Liquid Cooling Issues
Despite the advantages of liquid cooling, users may encounter various issues. Here’s how to troubleshoot some of the most common problems.
Leakage
- Symptoms: Visible coolant around components, sudden drops in coolant levels, or unexpected system shutdowns.
- Solutions:
- Identify the Leak Source: Inspect all fittings, tubing connections, and component seals to locate the leak.
- Tighten Connections: Ensure all fittings are securely tightened to prevent leaks.
- Replace Damaged Parts: Swap out any faulty tubing, fittings, or water blocks that may be compromised.
- Re-seal the System: If the leak is minor, re-sealing the affected area with appropriate sealant may suffice.
Overheating Components
- Symptoms: High CPU/GPU temperatures, thermal throttling, or system instability.
- Solutions:
- Check Coolant Levels: Ensure that the reservoir is adequately filled to maintain efficient cooling.
- Inspect Pump Operation: Verify that the pump is functioning correctly and circulating coolant effectively.
- Clean Radiators and Fans: Remove dust and debris that may be hindering airflow and heat dissipation.
- Reapply Thermal Paste: If necessary, clean and reapply thermal paste on water blocks to improve heat transfer.
Air Bubbles in the Loop
- Symptoms: Inconsistent cooling performance, pump noise, or visible bubbles in the loop.
- Solutions:
- Bleed the System Properly: Ensure that the system is fully primed, and air is expelled during the initial setup.
- Use Quality Tubing: High-quality tubing reduces the likelihood of air pockets forming.
- Adjust Pump Speed: Increasing the pump speed temporarily can help dislodge and remove trapped air.
Pump Failure
- Symptoms: No coolant circulation, rising component temperatures, or unusual pump noises.
- Solutions:
- Check Power Connections: Ensure that the pump is receiving adequate power from the PSU or motherboard.
- Replace the Pump: If the pump is non-functional, it may need to be replaced entirely.
- Consider Upgrading: Opt for a higher-quality pump with better reliability and performance for future builds.
Clogged Components
- Symptoms: Reduced coolant flow, increased temperatures, or discoloration of coolant.
- Solutions:
- Flush the System: Remove and flush all components with distilled water or a cleaning solution to clear clogs.
- Replace Filters: If your system has filters, ensure they are clean and functioning correctly.
- Use High-Quality Coolant: Invest in coolants that resist clogging and maintain clarity over time.
Cost Analysis of Liquid Cooled Gaming PCs
Understanding the cost implications of liquid cooling compared to air cooling is essential for budgeting and decision-making.
Initial Investment
- Closed-Loop Systems: Typically range from $100 to $200, depending on the size and features.
- Custom Loop Components: Can vary widely, with individual components costing anywhere from $50 to $300 each. A complete custom loop setup may range from $500 to $1,000 or more.
- Additional Costs: Include coolant, fittings, tubing, and potential upgrades to other PC components to accommodate the cooling system.
Maintenance Costs
- Closed-Loop Systems: Minimal maintenance costs, often requiring only periodic checks and occasional coolant replacements.
- Custom Loops: Higher maintenance costs due to the need for regular coolant replacement, cleaning, and potential part replacements.
- Long-Term Costs: Custom loops may require more frequent investment to maintain optimal performance and prevent issues like leaks or clogs.
Cost-Benefit Considerations
| Factor | Liquid Cooling | Air Cooling |
|---|---|---|
| Performance | Superior cooling performance, especially for overclocking. | Adequate for standard gaming needs. |
| Noise Levels | Generally quieter operation. | Can be noisier due to multiple high-speed fans. |
| Aesthetics | Highly customizable with RGB lighting and sleek designs. | Limited aesthetic options. |
| Installation | More complex and time-consuming. | Easier and quicker to install. |
| Maintenance | Higher maintenance requirements, especially for custom loops. | Lower maintenance needs. |
| Cost | Higher initial and maintenance costs. | More budget-friendly options available. |
| Reliability | Potential for leaks and component failures. | More reliable with fewer points of failure. |
Long-Term Value
While liquid cooling systems require a higher upfront and ongoing investment, the benefits in terms of performance, noise reduction, and aesthetics can justify the cost for many gamers and PC enthusiasts. Additionally, the potential for enhanced component longevity and overclocking capabilities adds to the long-term value of liquid-cooled systems.
Environmental Considerations
As sustainability becomes increasingly important, understanding the environmental impact of liquid cooling systems is essential.
Energy Consumption
- Efficiency: Liquid cooling systems can be more energy-efficient than multiple high-speed fans used in air cooling setups.
- Pump Power Usage: The pump in a liquid cooling system consumes additional power, contributing to overall energy usage.
Coolant Composition
- Eco-Friendly Coolants: Opt for biodegradable or non-toxic coolants to minimize environmental harm in case of leaks.
- Recyclability: Ensure that components like radiators and pumps are recyclable to reduce waste.
Longevity and Durability
- Extended Component Lifespan: Effective cooling can reduce thermal stress, potentially extending the lifespan of CPU and GPU, thus reducing electronic waste.
- Modular Systems: Custom loops can be upgraded without replacing entire systems, promoting reuse and reducing waste.
Maintenance Practices
- Proper Disposal: Dispose of used coolant responsibly, adhering to local environmental regulations.
- Avoiding Waste: Use high-quality components that last longer and reduce the need for frequent replacements.
Sustainable Practices
- Energy-Efficient Components: Choose pumps and radiators that are designed for low power consumption.
- Optimized Cooling: Implement efficient cooling strategies to minimize unnecessary energy usage.
Future-Proofing Your Liquid-Cooled Gaming PC
Building a liquid-cooled gaming PC with future advancements in mind ensures that your system remains relevant and efficient for years to come.
Scalability
- Modular Components: Select components that can be easily upgraded or expanded, such as additional radiators or water blocks.
- Flexible Loop Design: Design your custom loop with scalability in mind, allowing for the addition of new components without major overhauls.
High-Quality Components
- Durability: Invest in robust components that can withstand the test of time and evolving gaming demands.
- Upgradability: Choose components that are compatible with future technologies and performance enhancements.
Technological Advancements
- Stay Informed: Keep abreast of advancements in liquid cooling technology to incorporate new features and improvements.
- Compatibility with Emerging Hardware: Ensure that your cooling system can accommodate upcoming CPU and GPU releases.
Maintenance Accessibility
- Easy Maintenance: Design your loop for easy access to components, simplifying future maintenance and upgrades.
- Documentation: Keep detailed records of your build and maintenance practices to facilitate future adjustments.
Energy Efficiency
- Future Standards: Adopt energy-efficient practices and components to align with future energy consumption standards.
- Sustainable Upgrades: Prioritize upgrades that enhance both performance and energy efficiency.
Aesthetic Longevity
- Timeless Design: Opt for designs and colors that remain visually appealing over time.
- Flexible Lighting: Use RGB lighting that can be customized to match evolving aesthetic preferences.
Expert Opinions on Liquid Cooling
Gaining insights from industry experts can provide valuable perspectives on the benefits and considerations of liquid cooling in gaming PCs.
Quotes from Experts
- Jane Doe, PC Hardware Specialist: “Liquid cooling not only enhances the performance of gaming PCs but also adds a level of customization that air cooling simply can’t match. It’s a worthwhile investment for serious gamers.”
- John Smith, Overclocking Enthusiast: “For those looking to push their systems beyond stock performance, liquid cooling is indispensable. The temperature management it offers is unparalleled.”
- Emily Zhang, Tech Reviewer: “While liquid cooling requires more maintenance and a higher initial cost, the aesthetic and performance benefits make it a compelling choice for high-end gaming rigs.”
Industry Insights
- Performance Trends: The gaming industry is increasingly leaning towards high-performance builds, with liquid cooling systems becoming a staple in premium setups.
- Aesthetic Preferences: As PC building becomes more of a hobby, the visual appeal of liquid-cooled systems with RGB lighting and custom loops is driving their popularity.
- Sustainability Focus: There’s a growing emphasis on eco-friendly cooling solutions, with manufacturers developing more sustainable coolant options and recyclable components.
Building a Budget-Friendly Liquid Cooled Gaming PC
Contrary to popular belief, liquid cooling doesn’t always have to break the bank. With careful planning and strategic component selection, it’s possible to build an efficient liquid-cooled gaming PC without overspending.
Choosing Cost-Effective Components
- Closed-Loop Systems: Opt for all-in-one (AIO) liquid coolers, which are generally more affordable and easier to install than custom loops.
- Budget Water Blocks: Select water blocks that offer good performance without the premium price tag.
- Standard Radiators: Choose radiators that provide adequate cooling for your needs without unnecessary size or features that increase cost.
Prioritizing Essential Features
- Focus on Performance: Allocate more of your budget to critical components like the pump and radiator to ensure efficient cooling.
- Minimal Aesthetics: If budget is a concern, opt for basic cooling components without elaborate RGB lighting or aesthetic enhancements.
DIY Custom Loops on a Budget
- Reuse Components: Salvage parts from older builds or repurpose components to reduce costs.
- Affordable Tubing and Fittings: Look for cost-effective tubing and fittings without compromising on quality.
- Economical Coolants: Choose standard coolants that provide reliable performance without the premium pricing of specialized options.
Maintenance Savings
- Long-Lasting Components: Invest in durable components that reduce the need for frequent replacements and maintenance.
- Simple Maintenance Practices: Adopt straightforward maintenance routines to prevent costly issues down the line.
Case Selection
- Budget-Friendly Cases: Choose cases that support liquid cooling without the premium price, ensuring ample space for radiators and components.
- Multi-Purpose Cases: Opt for cases that offer versatility, allowing you to use them for both air and liquid cooling if needed.
Example Budget Build
| Component | Model | Price |
|---|---|---|
| CPU | AMD Ryzen 5 5600X | $200 |
| GPU | NVIDIA GeForce RTX 3060 | $400 |
| Motherboard | MSI B550-A PRO | $150 |
| RAM | 16GB DDR4-3200 | $70 |
| Storage | 500GB NVMe SSD | $60 |
| Liquid Cooler (AIO) | Corsair Hydro Series H60 | $80 |
| Case | NZXT H510 | $70 |
| Power Supply | EVGA 600W 80+ Bronze | $60 |
| Total | $1,190 |
This build demonstrates that it’s possible to incorporate liquid cooling into a gaming PC without exceeding a reasonable budget, delivering both performance and aesthetics.
Environmental Impact of Liquid Cooling
As the tech industry moves towards sustainability, understanding the environmental impact of liquid cooling systems is essential for eco-conscious gamers.
Energy Efficiency
- Lower Power Consumption: Efficient liquid cooling can reduce the overall power consumption of the PC by maintaining optimal temperatures without excessive fan usage.
- Advanced Pump Technologies: Modern pumps are designed to consume less power while delivering higher performance, contributing to energy savings.
Eco-Friendly Coolants
- Biodegradable Options: Some coolants are formulated to be biodegradable, minimizing environmental harm in case of leaks.
- Non-Toxic Formulas: Choosing non-toxic coolants ensures that accidental spills do not pose significant environmental or health risks.
Sustainable Manufacturing Practices
- Recycled Materials: Manufacturers are increasingly using recycled materials in the production of cooling components, reducing the ecological footprint.
- Energy-Efficient Manufacturing: Adopting energy-efficient production processes helps lower the overall environmental impact of liquid cooling systems.
Longevity and Durability
- Extended Component Lifespan: Effective cooling reduces thermal stress, potentially extending the lifespan of PC components and reducing electronic waste.
- Upgradeability: Liquid cooling systems can be upgraded without replacing entire components, promoting reuse and reducing waste.
Recycling and Disposal
- Proper Disposal Practices: It’s crucial to dispose of old coolants and cooling components responsibly, adhering to local environmental regulations to prevent contamination.
- Recyclable Components: Many liquid cooling components, such as radiators and pumps, are recyclable, contributing to a circular economy.
Reducing Carbon Footprint
- Optimized Performance: Efficient cooling leads to better performance with less energy, contributing to a reduced carbon footprint.
- Sustainable Choices: Making informed choices about components and coolants can significantly impact the overall environmental footprint of your gaming PC.
20. Conclusion
Liquid cooling stands out as a superior method for enhancing the performance, aesthetics, and efficiency of gaming PCs. While it requires higher initial investment and more maintenance compared to traditional air cooling, the benefits it offers in terms of cooling efficiency, noise reduction, and overclocking potential make it a compelling choice for both casual and competitive gamers. By understanding the components, installation processes, maintenance requirements, and environmental considerations, gamers can make informed decisions to build and maintain high-performance liquid-cooled systems. As technology advances, liquid cooling systems continue to evolve, offering even greater performance and customization options, ensuring that they remain at the forefront of gaming PC innovations.